
This week I worked on a custom Warmoth bass guitar for my pal Dave, who is one of the owners of Algiers Music Point (one of my favorite music stores in New Orleans). This is his go to bass, and understandably so: Warmoth makes killer parts, and this one had a wonderfully resonant walnut body that sounded fantastic. I had previously done a fret level and setup on Dave’s 6-string bass, and he liked it so much he wanted that done on his four string bass, too (incidentally, Warmoth recommends fret work on their own necks to get them to play cleanly). As we were discussing how much he loved the sound of this bass, I suggested some small electronics modifications: his bass was simply equipped with two Seymour Duncan Basslines Humbuckers, a volume knob, and a three way switch, but the electronics cavity was routed really large, to where he could fit a ton of controls in there if he wanted to. I suggested that we could add a couple of things to expand upon the already great tone he was getting, and Dave opted to have a couple of mini-switches installed to achieve parallel/split/series tones for each pickup.
Installing new guitar electronics was going to require drilling some holes in the bass – and if one is going to be making new holes in an instrument, it’s go to be absolutely perfect! There’s only one chance to do this right, and if it gets screwed up, it’s going to be super obvious. The old adage of measure twice, cut once certainly applies here.
First, I removed all the old electronics and covered the area I was intending to work with painter’s tape. Dave wanted all the switches together in line, and the volume knob closer to the strings, so I was going to create a new hole between the old volume and toggle switch holes, and then drill a new hole for the volume. To get a feel to where the electronics should go, I placed the unwired components on top, and moved them around until it looked about right:

Satisfied with this, I very carefully measured out and marked off where every thing was to go, like so:

All the switches have to be EXACTLY in line – if they’re even slightly off it would be noticeable. To do this, I marked out the outside edges of the existing holes, then found the centerline between them, and marked that off. The volume knob was placed exactly halfway between the first switch and the bridge-most corner of the rear pickup. After checking placement again with the unwired components, I was ready to drill.
I first made a small pilot hole with a center punch, then used a small drill bit to cut through. I didn’t use a full size bit to start with, as that might have caused the wood to tear out. Instead, I used a special bit designed to widen existing holes, like so:

Viola! Two new perfectly placed holes:

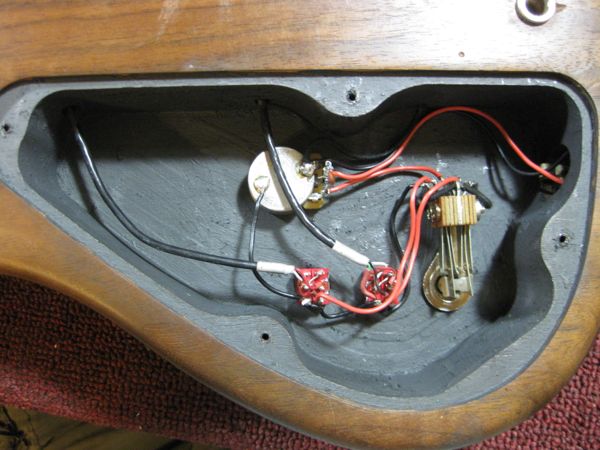
Now that the hard stuff was done, all that was left was to wire it up. Since there was some sloppy work done on the instrument previously, I decided to rewire the entire thing. Working with existing wiring can be tricky – my own work can be totally solid, but if some other part fails that I didn’t do, then it can still be perceived as being my fault! So, I scrapped the bad shielding job and pulled all the original wiring out, and replaced it with my own work:
With the fretwork, setup, new bone nut, and expanded control scheme, this bass plays and sounds better than ever.

Enjoy Dave! Thanks!
