
[Today’s blog post is guest written by my good friend, Aaron Younce, who is a brilliant luthier who builds custom bass guitars in Brooklyn, NY. Since he’s such a talented woodworker, and my home shop is not currently set up to make tons of wood dust, I sent him this Telecaster body to carve in some Strat-like contours. Aaron and I have worked together for many years, and I trust him implicitly, both with guitar work and with taking over this blog. – Benjamin]
Love the sound of your Tele, but wish it was as comfortable as your Strat? Say no more.
My name is Aaron, and I am a luthier by trade. I spend my days carving custom solid body bass guitars in Brooklyn, NY and somehow make a living at it. Benjamin and I spent several years working side by side in San Francisco’s top guitar repair shop, and remain collaborators and co-conspirators to this day.
He recently shipped a plain-Jane Tele body to me to have some relief contours carved into it (similar to the contours of a Stratocaster) at the customer’s request. Using very simple traditional wood carving tools I proceeded to modernize a very simple, traditional guitar design.
The tool on the bottom left is a coarse rasp used for massive wood removal.
The next is a Dragon file, and is used for finer shaping.
The three sanding blocks were used for for smoothing out bumps and refining the final shape of the convex curves, and I wrapped the file in sandpaper to smooth the concave curves.

The three sanding blocks in order from the smallest to largest width are 80 grit, 120 grit, and 220 grit. Since this guitar will be refinished after it is carved, 220 grit will leave a sufficient surface for now.
 Sanding tips: If you are planning to spray an opaque finish, 220 grit is sufficient before applying wood sealer.
If you are planning to spray a translucent finish, 320 or 400 grit should be used to minimize visible sanding scratches.
If you are planning to apply an oil finish, use 400 grit or higher to eliminate any detectable scratches.
This is the raw surface the coarse rasp creates. It allows me to quickly arrive to about 80% of the final shape of this arm contour.
 This is the surface the Dragon file creates. A little smoother, but still not quite there.

Then I flip the body over and carve the belly contour using the coarse rasp and the Dragon file.
This customer wanted a relief carved into the back of the treble horn, and the heel area under the neck plate angled down for more comfortable access to the high register. Those of you who own Fenders understand why.
 Finally, I go back over everything with sanding blocks, and a sandpaper-wrapped file to finish the job.


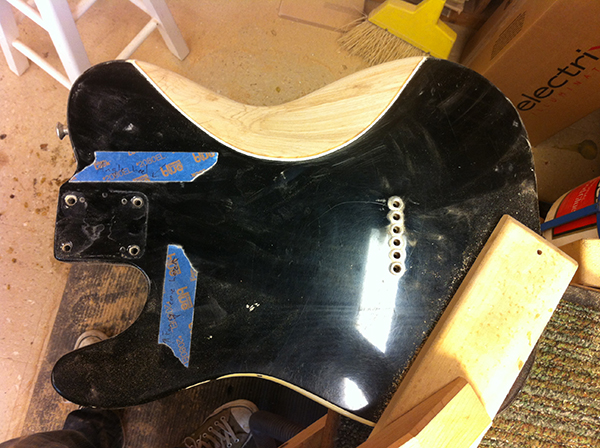
 The rest of the polyurethane finish, and wood sealer still needs to be removed before preparations for re-finising begin, but my work here is done!
